
Mapping Values in the Arduino World: A Comprehensive Guide to the map() Function
Related Articles: Mapping Values in the Arduino World: A Comprehensive Guide to the map() Function
Introduction
With enthusiasm, let’s navigate through the intriguing topic related to Mapping Values in the Arduino World: A Comprehensive Guide to the map() Function. Let’s weave interesting information and offer fresh perspectives to the readers.
Table of Content
Mapping Values in the Arduino World: A Comprehensive Guide to the map() Function
The Arduino platform, renowned for its accessibility and versatility, offers a wealth of functions designed to simplify complex programming tasks. Among these, the map() function stands out as a powerful tool for seamlessly transforming values between different ranges. This function serves as a bridge, enabling the conversion of sensor readings, potentiometer outputs, or any other numerical data into a format suitable for driving actuators, controlling LEDs, or generating graphical representations.
Understanding the Essence of Mapping
At its core, the map() function performs a linear interpolation, effectively scaling a value from one range to another. Imagine you have a sensor that outputs a value between 0 and 1023, representing the intensity of light. You want to use this data to control the brightness of an LED, which accepts values between 0 and 255. The map() function acts as the intermediary, converting the sensor’s reading into a brightness level that the LED can understand.
The Anatomy of the map() Function
The map() function operates with five parameters:
-
value: The input value that needs to be mapped. This is the raw data received from the sensor, potentiometer, or any other source. -
fromLow: The lower limit of the input value’s original range. This represents the minimum value that the input can take. -
fromHigh: The upper limit of the input value’s original range. This represents the maximum value that the input can take. -
toLow: The lower limit of the desired output range. This defines the minimum value that the output should have. -
toHigh: The upper limit of the desired output range. This defines the maximum value that the output should have.
The function calculates the corresponding output value based on the provided parameters, ensuring that the output remains within the specified range.
Illustrative Example: Mapping Sensor Readings to LED Brightness
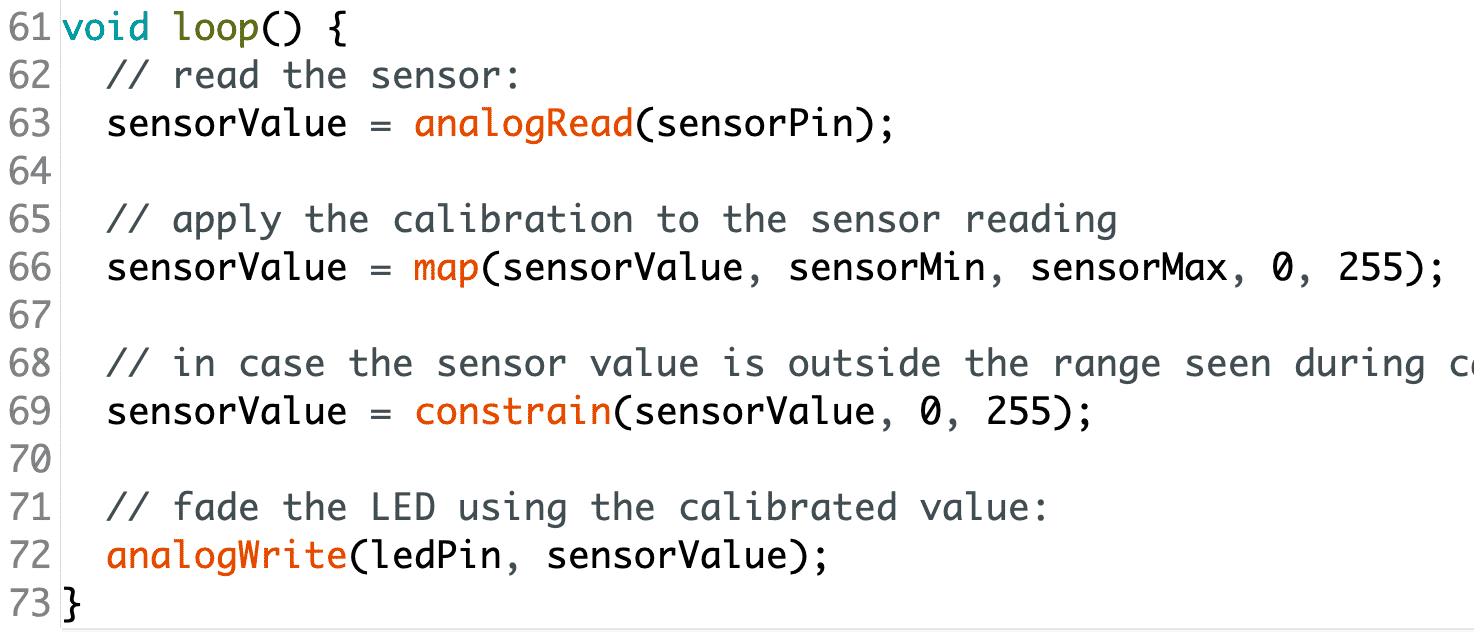
Consider a scenario where a light sensor is connected to an Arduino board. The sensor provides a reading between 0 and 1023, representing the light intensity. You wish to control the brightness of an LED based on this reading, with higher light intensity resulting in brighter LED illumination.
int sensorValue = analogRead(A0); // Read the sensor value
int ledBrightness = map(sensorValue, 0, 1023, 0, 255); // Map the sensor value to LED brightness
analogWrite(9, ledBrightness); // Set the LED brightness
In this example, sensorValue represents the raw reading from the light sensor, ranging from 0 to 1023. The map() function transforms this value into ledBrightness, which is then used to control the LED’s brightness. The output range for ledBrightness is set to 0 to 255, compatible with the Arduino’s analogWrite function.
Benefits of Using the map() Function
The map() function offers several advantages:
-
Simplicity: It simplifies the process of converting values between different ranges, eliminating the need for manual calculations.
-
Flexibility: It can be used to map any type of numerical data, including sensor readings, potentiometer outputs, and even user-defined variables.
-
Efficiency: It performs the mapping operation efficiently, requiring minimal processing power.
-
Readability: It enhances code readability by encapsulating the mapping logic in a concise function call.
Beyond Linear Interpolation: Exploring Advanced Mapping Techniques
While the standard map() function offers linear interpolation, more sophisticated mapping techniques exist for specific applications.
-
Non-linear Mapping: This involves using mathematical functions like logarithmic or exponential curves to achieve non-linear mapping, allowing for more nuanced control.
-
Lookup Tables: For situations where a precise mapping relationship is required, lookup tables can be employed to store pre-defined values, providing a more accurate representation.
Frequently Asked Questions
Q: Can the map() function handle negative values?
A: Yes, the map() function can handle both positive and negative values. It will map the input value proportionally to the output range, even if the input or output ranges include negative values.
Q: What happens if the input value falls outside the specified input range?
A: If the input value is below fromLow, the output value will be set to toLow. Conversely, if the input value is above fromHigh, the output value will be set to toHigh.
Q: Can I use the map() function to map values to a different data type?
A: The map() function only works with numerical data types, such as integers and floats. It does not directly support mapping to other data types like strings or booleans.
Tips for Effective Use of the map() Function
-
Clearly define the input and output ranges: Ensure that the
fromLow,fromHigh,toLow, andtoHighparameters accurately represent the ranges of the input and desired output values. -
Consider non-linear mapping: If a linear mapping does not suit your application, explore non-linear mapping techniques using mathematical functions or lookup tables.
-
Test thoroughly: After implementing the
map()function, thoroughly test its behavior with different input values to ensure it produces the desired output.
Conclusion
The map() function is an indispensable tool in the Arduino programmer’s arsenal, simplifying the process of converting values between different ranges. By understanding its workings and leveraging its flexibility, developers can create more intuitive and responsive applications, enhancing the user experience. From controlling actuators based on sensor readings to generating dynamic visualizations, the map() function empowers developers to harness the full potential of the Arduino platform.


Closure
Thus, we hope this article has provided valuable insights into Mapping Values in the Arduino World: A Comprehensive Guide to the map() Function. We appreciate your attention to our article. See you in our next article!